Teaching Oral Reading Fluency
By Mary Montero
Share This Post:
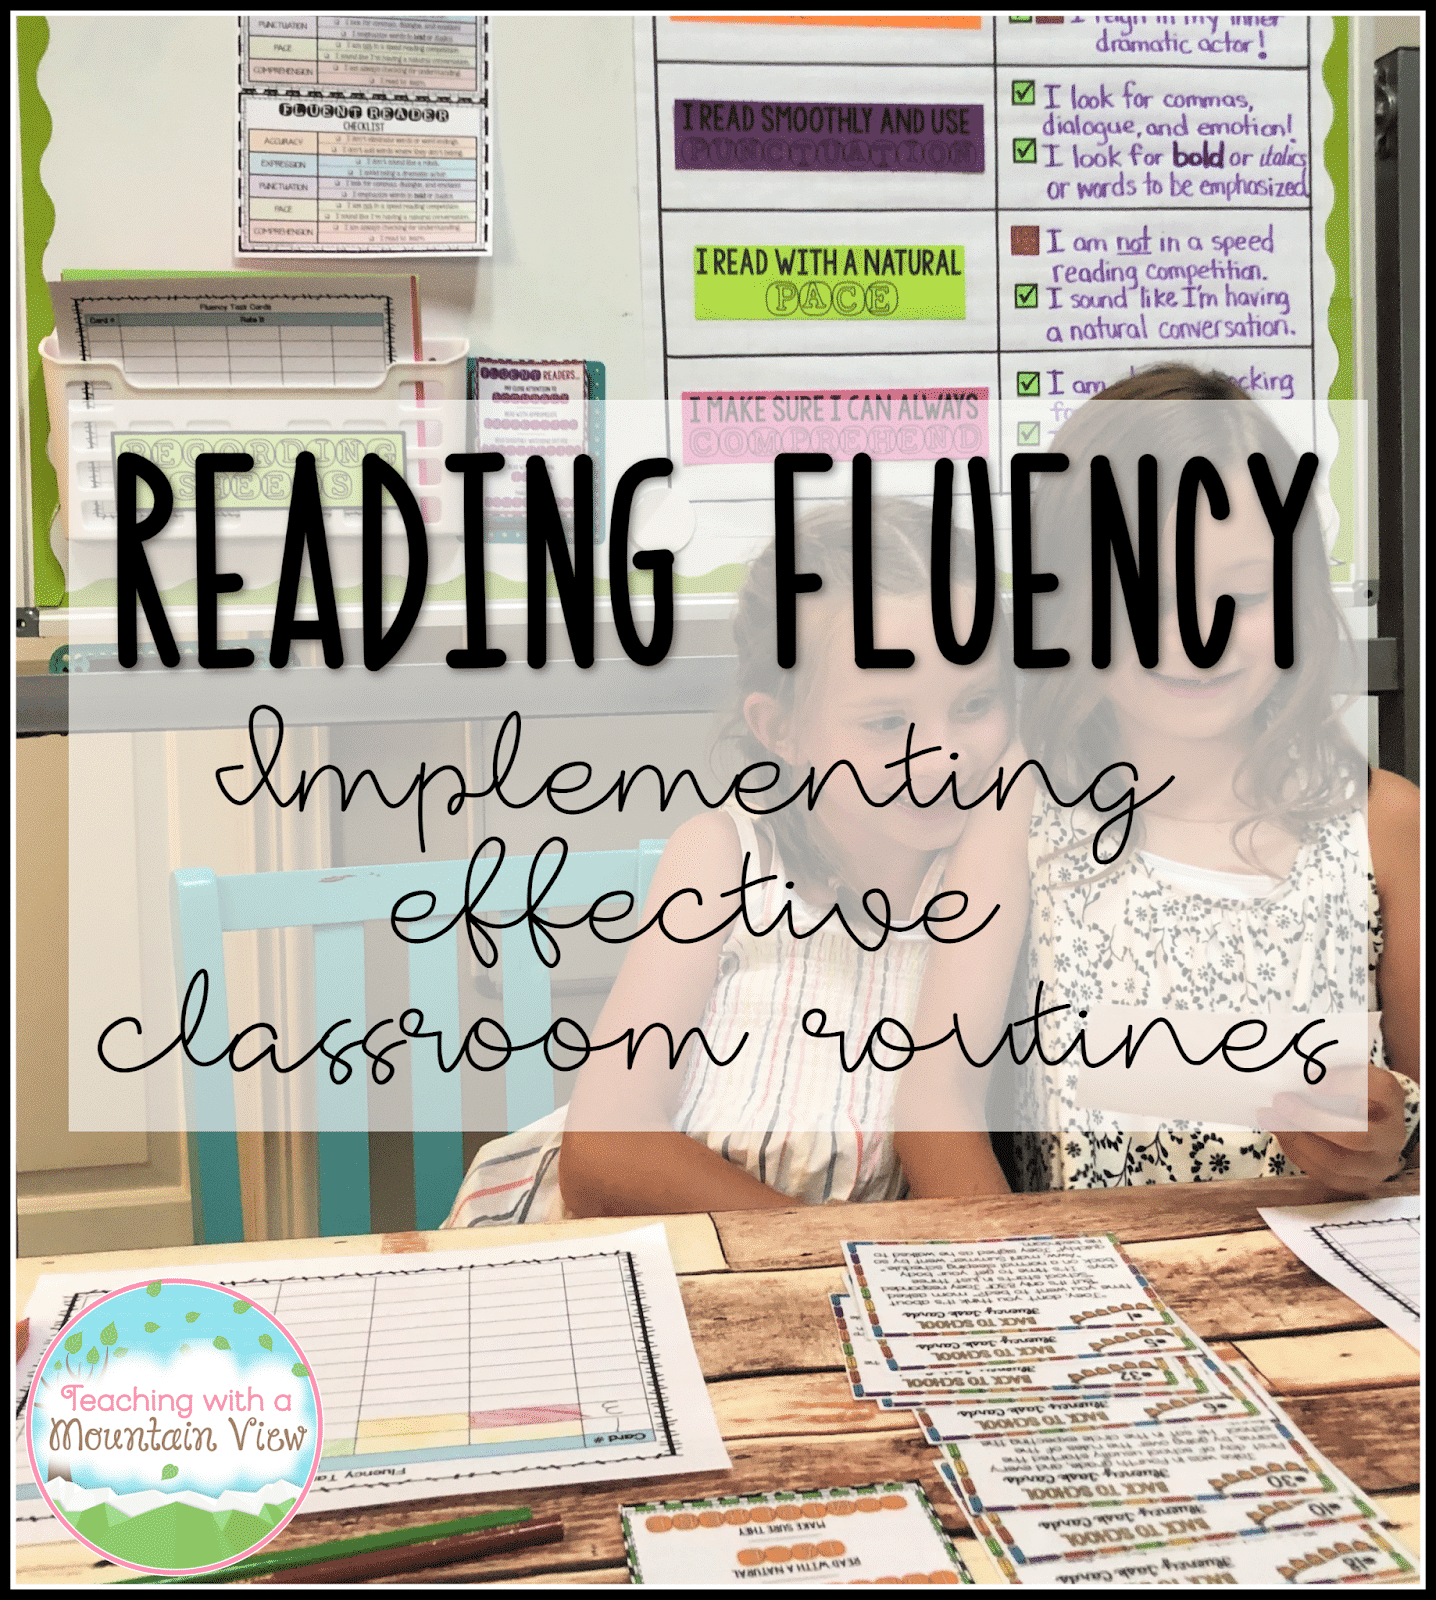
One of the top questions I get is always about how I run my math and reading rotations. As I prepare to share those formats with you, I’ll be sharing some of the components of them individually as well. Today’s topic is oral reading fluency, which is one of the very first “reading skills” I teach at the beginning of the year!
First, a little bit of background about why I insist on including oral reading fluency instruction in ALL of my elementary classrooms. Oral reading fluency is always one of my reading rotations because I so strongly believe in the importance of building fluent readers who have developed the ability to read accurately, at a natural pace, and with excellent prosody/expression.
The Research on Fluency
Research shows that reading fluency is a direct indicator of comprehension success. In other words, when students can read fluently, they are significantly more likely to understand what they are reading. Multi-tasking is tough for even the most skilled readers. Building reading fluency and freeing students from the task of decoding allows them to build automaticity. This automaticity (fluency) allows readers to focus on the actual act of reading and enables them to put their energy and focus into understanding and synthesizing the text. We have to place a focus on building fluent readers if we want to build efficient readers who comprehend what they are reading.
Fluency, then, simply has to be front and center in our reading instruction. Not just in 2nd grade, not just in 3rd grade, but in 4th and 5th grade, too. The words and complexity of texts they are expected to read fluently in 2nd grade are wildly different than those in 4th and 5th grade. We can’t stop practicing! It’s our obligation to solidify these essential reading skills to set our students up for success.
Teaching Kids About Fluency
But before you have students working on developing fluency, they need to know what it is, how they can improve it, and of course, what it sounds like. I truly believe that some direct instruction on reading fluency is key to student growth.
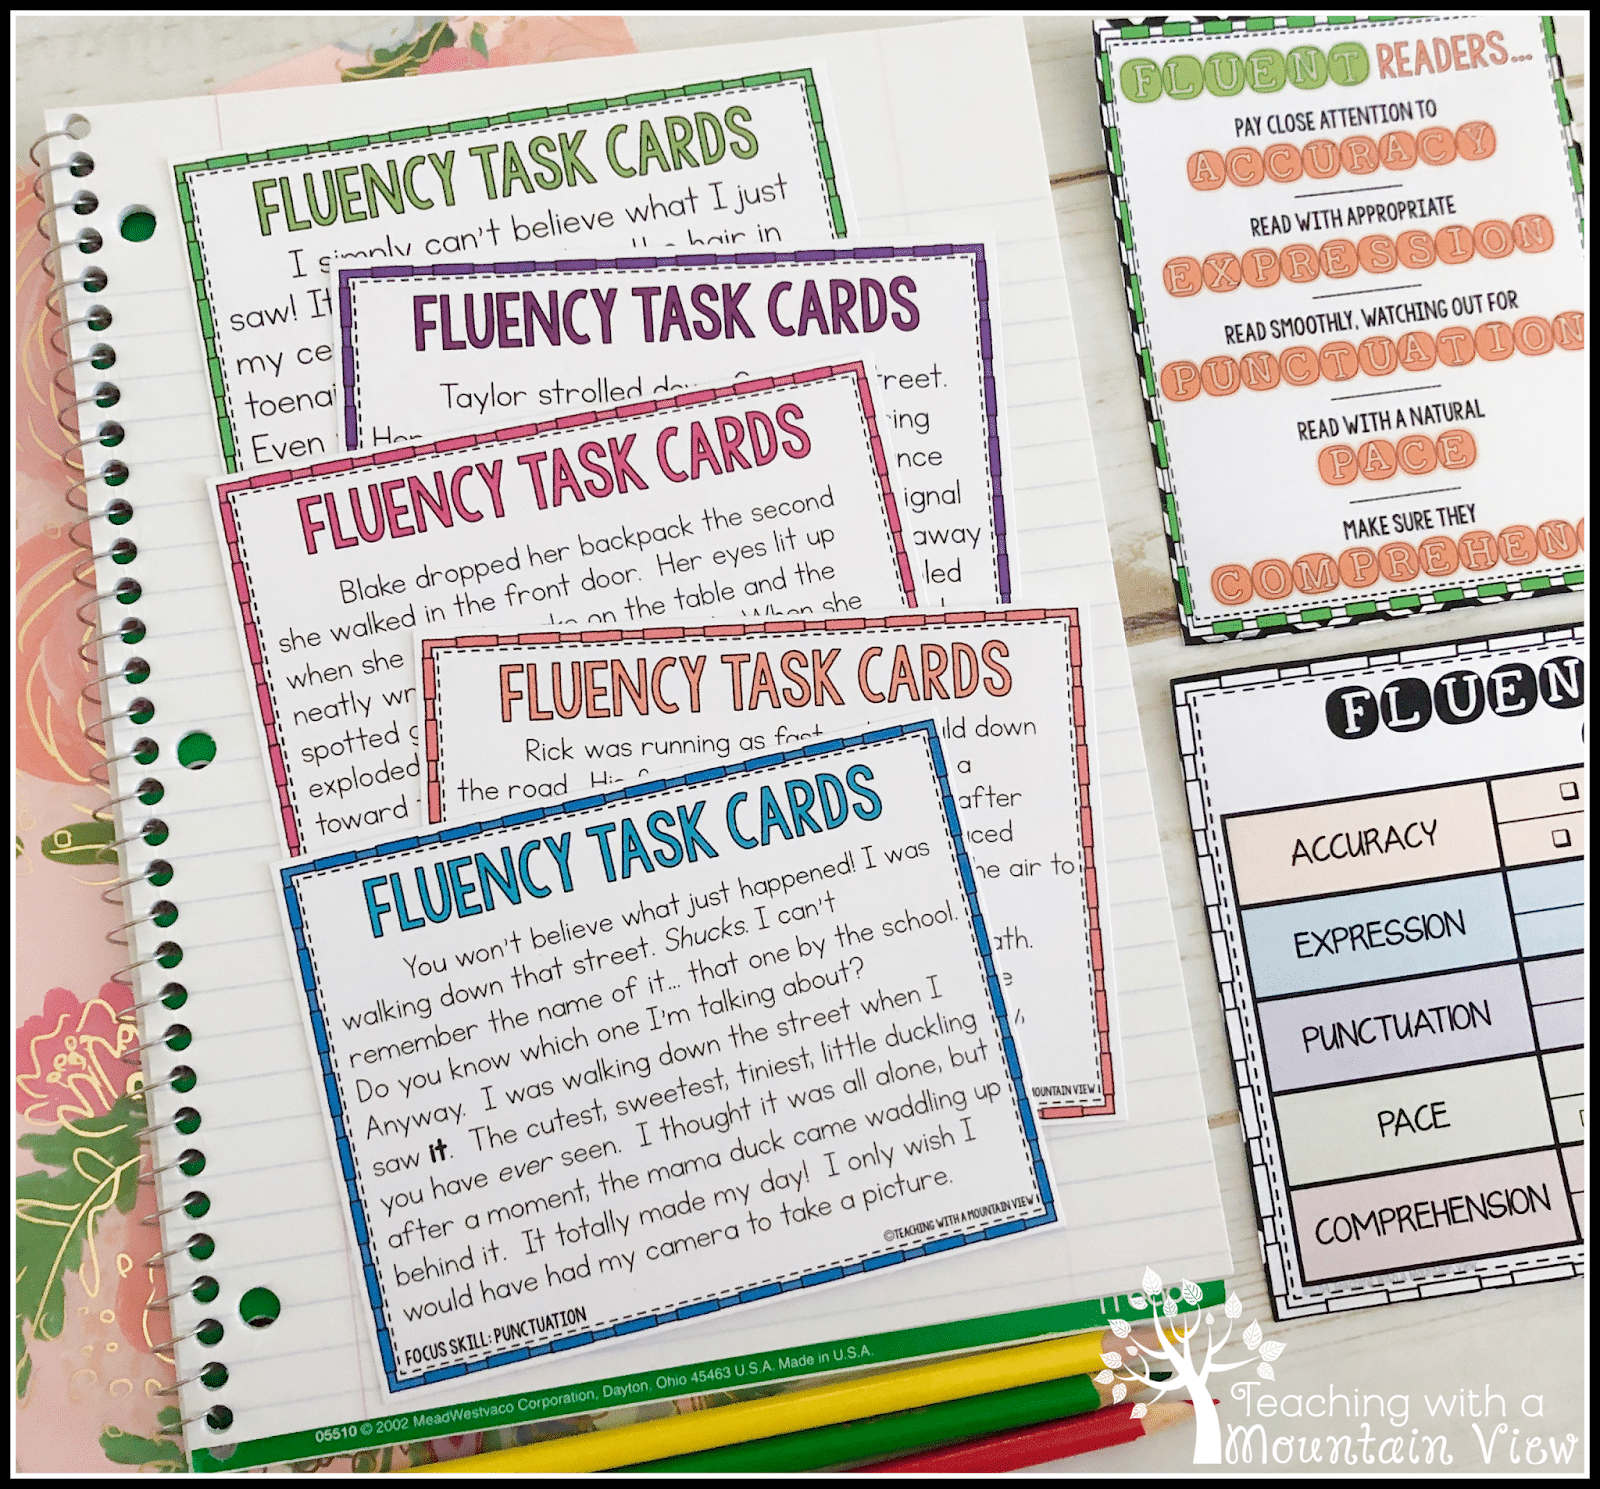
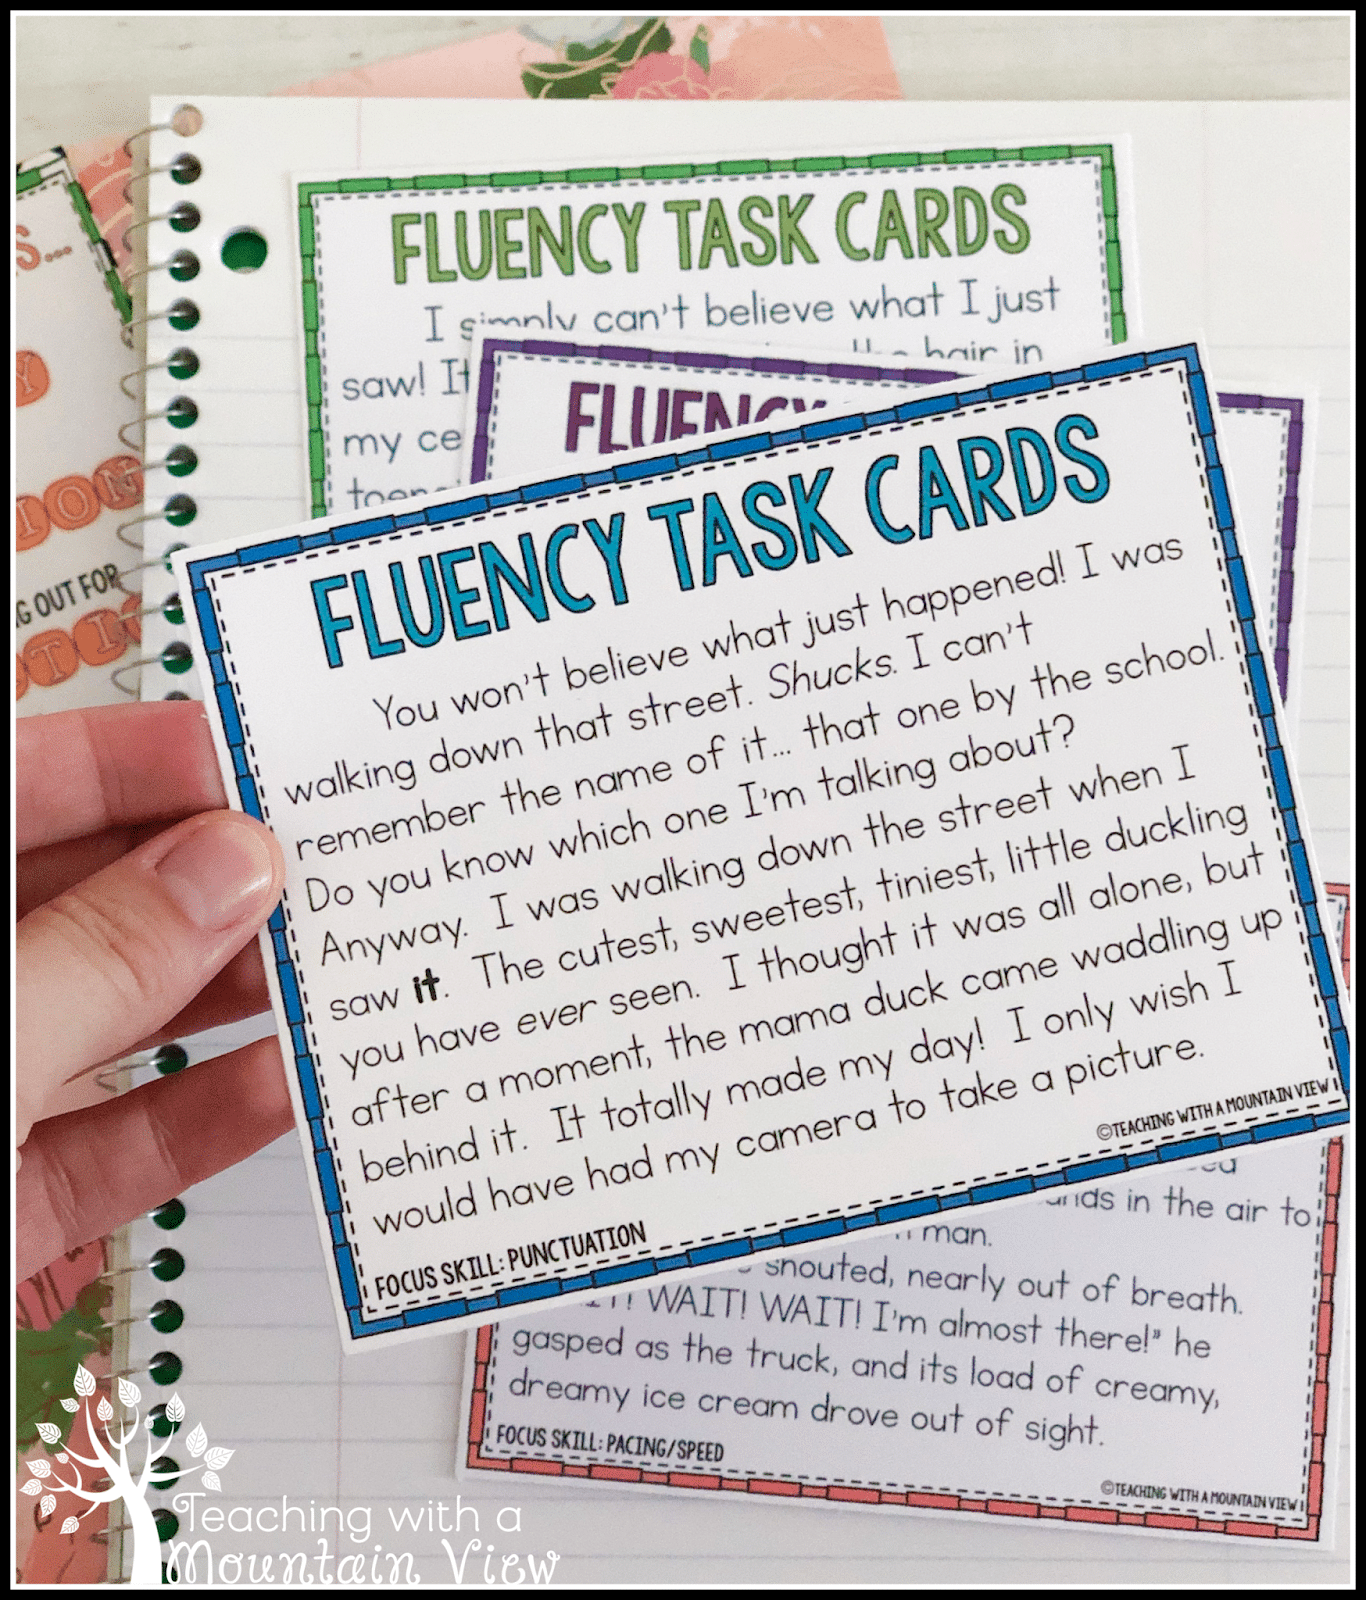
Each year, I start out with a few mini lesson on reading fluency. You could do these fluency lessons all in one day, but I find it more effective to really focus on one element of fluency each day for a week and then combine it all. These mini lessons only need to take 10 minutes with five minutes or so of practice. I use my Fluency Task Cards in all of the lessons. Since we use them so frequently in centers, it’s a good way to start. Everything you need to implement these five days of fluency lessons is completely FREE.
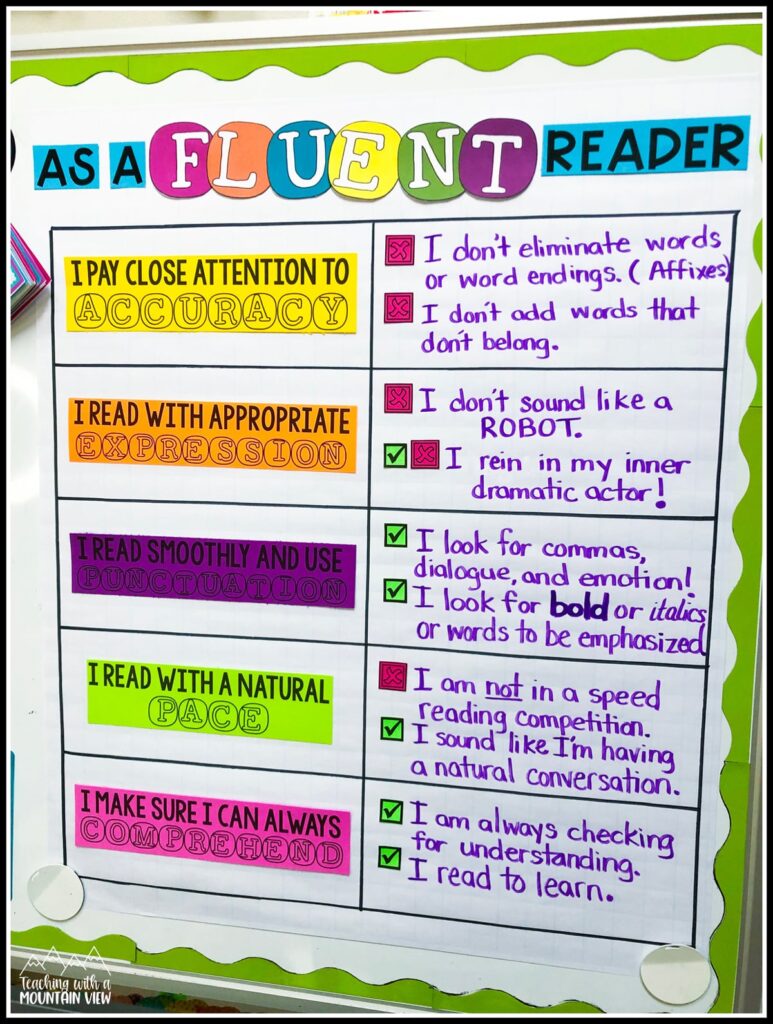
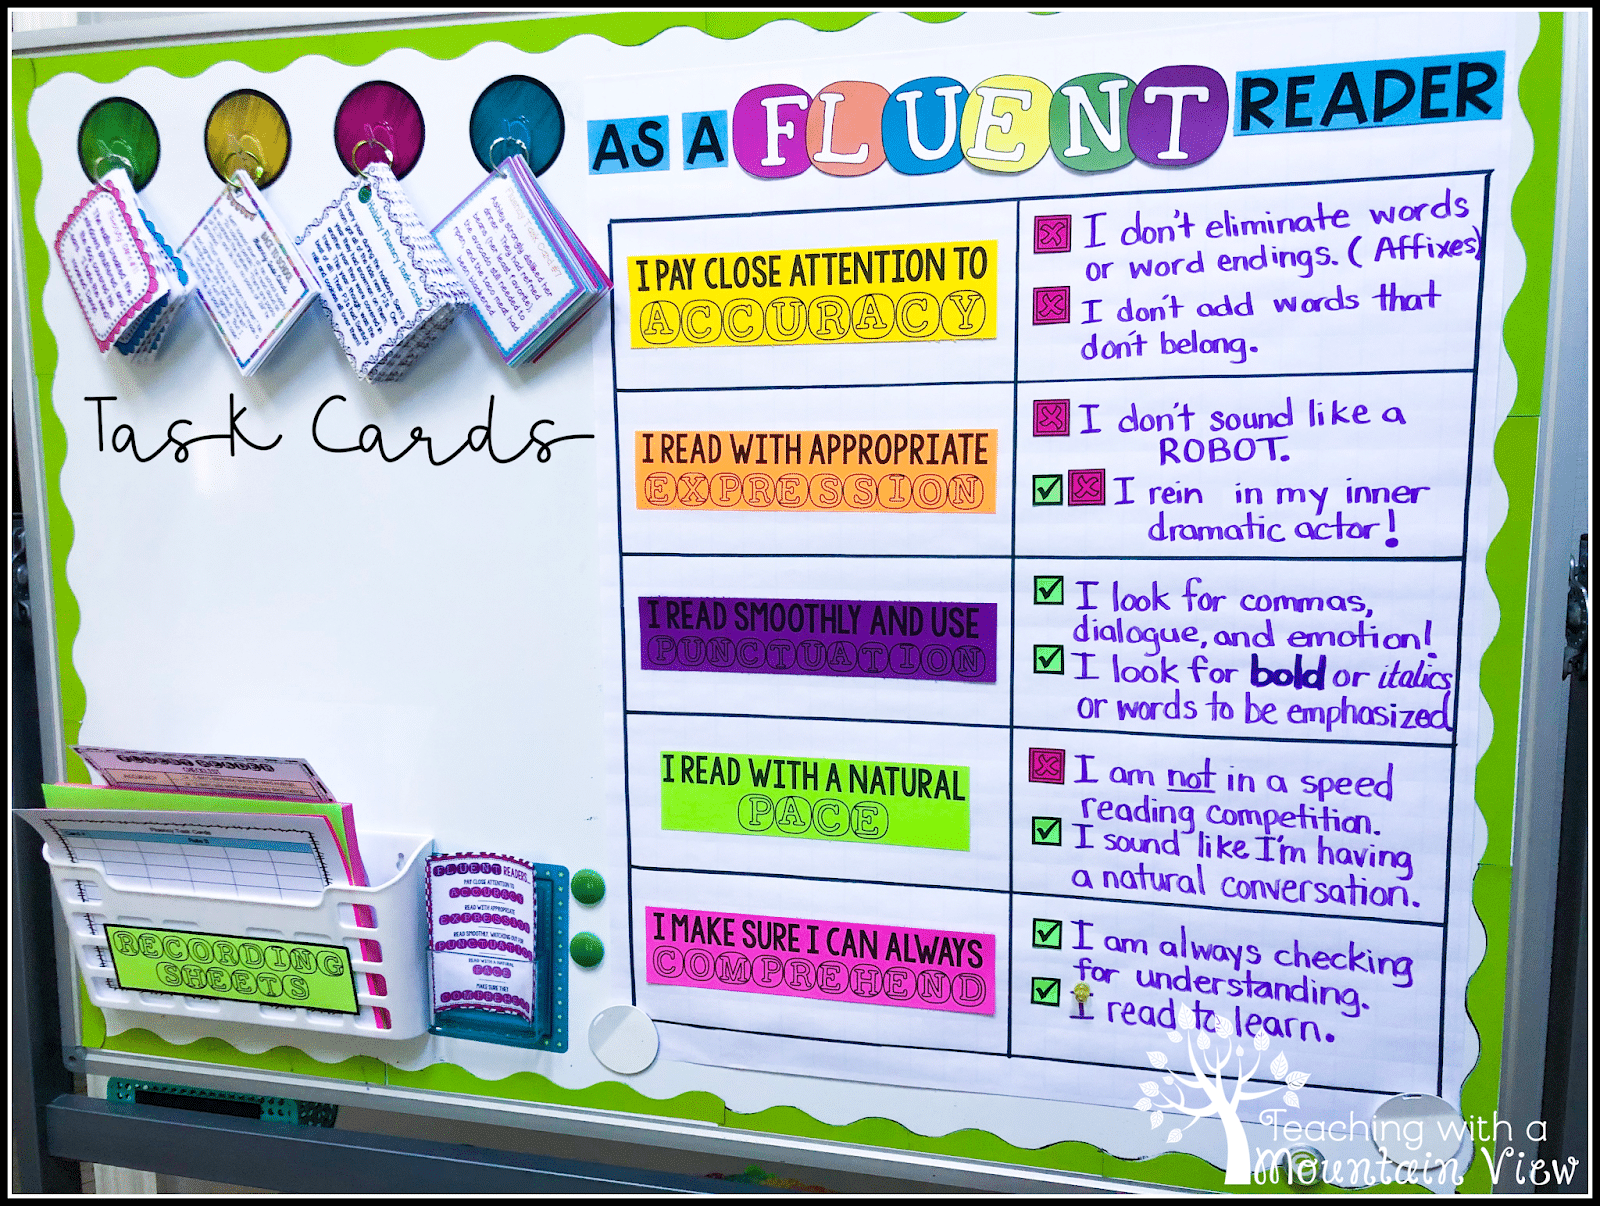
Here is the fluency anchor chart that we build as we learn about each element of a fluent reader. Remember to create this fluency anchor chart WITH you students. It does little good if you make it and then just hang it up one day. However, if you create it WITH them, they will know exactly what it says and know when to reference it.
If you’d like to make your anchor chart look like mine, you can download the printable elements for free HERE, but again, please make sure you make it an interactive experience with your students… especially the handwritten part!
Here is an overview of the lessons I teach each day as I introduce reading fluency.
Daily Lessons for Oral Reading Fluency
Day 1: Accuracy
On this day, we focus on reading accurately as a component of fluency. I define that for them as:
If I’m reading accurately,
- I don’t eliminate words, word endings, or word beginnings.
- I don’t add words that don’t belong
In other words, fluent readers don’t make very many mistakes when they are reading. I used to add that you shouldn’t “guess” at words, but now I am sure to clarify that they shouldn’t guess at words without making sure they make sense within the context of the sentence.
Accuracy Activity: I put up a short fluency task card on the document camera and then give them each a black and white copy of it and tell them to mark any, but at least ONE, errors that I make while reading. Then, I do a fairly abysmal job of reading it out loud to them. I read it nice and speedily, but I throw in extra words, I add or eliminate some prefixes or suffixes, and sometimes I totally misread a word because I’m going too fast. Then we have a little discussion about all the ways I was not an accurate reader and why, even though I read fast, it isn’t going to help me become a better reader with all those mistakes! I like to jot these down in our reading notebooks, too!
Day 2: Expression/Prosody
On this day, we focus on reading with expression, or having excellent prosody. This is always a favorite day because we get to be a little bit silly! Define that for them as: If I’m reading with appropriate expression,
- I don’t sound like a robot
- I rein in the dramatic actor living inside of me
This one is pretty straight forward, but it’s something they need to be reminded of.
Expression Activity: I have blogged about this activity before, so you can hop over to THIS blog post about the activity I do to encourage expressive readers. I use the book Good Boy, Fergus for this activity. You can use this one for punctuation as well!
Additionally, I pull out the same task card that we used yesterday. This time, I explain that my accuracy is going to be on point, but that I want them to pay careful attention to my expression. I read it robotically and I read it like a stage actor presenting Shakespeare. Then I read it normally. We talk about the differences in my reading and which one makes more sense.
I end by giving them each a different fluency task card and having them read it all three ways: like a robot, like an actor, and normally. (This is when you’ll use the Expression task card included for free in the set!)
Day 3: Punctuation
Today, we focus on using punctuation to become more fluent readers. This day flows really well after expression day because it reinforces how to use your expression appropriately. If you didn’t use Good Boy, Fergus yesterday, you can use it today, and if you DID use it yesterday, I highly encourage you to pull it out again and talk about how the punctuation in the book contributes to your appropriate expression.
If I’m paying attention to punctuation while I read,
- I look for commas, periods, exclamation marks, and dialogue markers
- I look for words in bold or italics to emphasize
Punctuation Activity: For our main activity on this day, I make a copy of one of my punctuation-specific fluency task cards and use White Out to eliminate all of the punctuation in it. I have them read it out loud. It’s obviously a hot mess, and they know it! Then, I give them a copy WITH punctuation, and we talk about the difference.
Day 4: Pace
PACING is what most kids think about when they are talking about fluency. It’s the rate or speed at which they are reading. I define it as…
If I’m reading with natural pacing,
- I’m not pretending to be in a speed reading competition.
- I read as though I’m having a natural conversation.
Pacing Activity: Yep, you guessed it. We have a speed reading competition. Things get crazy. Nobody can understand a word. Nobody can retell what they just read. Another big old mess of a reading! We also go nice and slow… too slow. On this day, we usually do a choral reading as well. I’ll read it with exceptional pacing, then guide them in reading it all together at a nice, natural pace.
Day 5: Comprehension
Day 5 leads us into our essential reading skills. Since I do this series of fluency lessons at the very beginning of the year, after this week, I dive right in to teaching reading skills. (You can read more about how and when I teach reading skills HERE.) Therefore, I don’t spend a ton of time talking about comprehending other than telling them that it means they understand what they are reading.
If I’m comprehending what I’m reading,
- I am always checking for understanding
- I read to learn
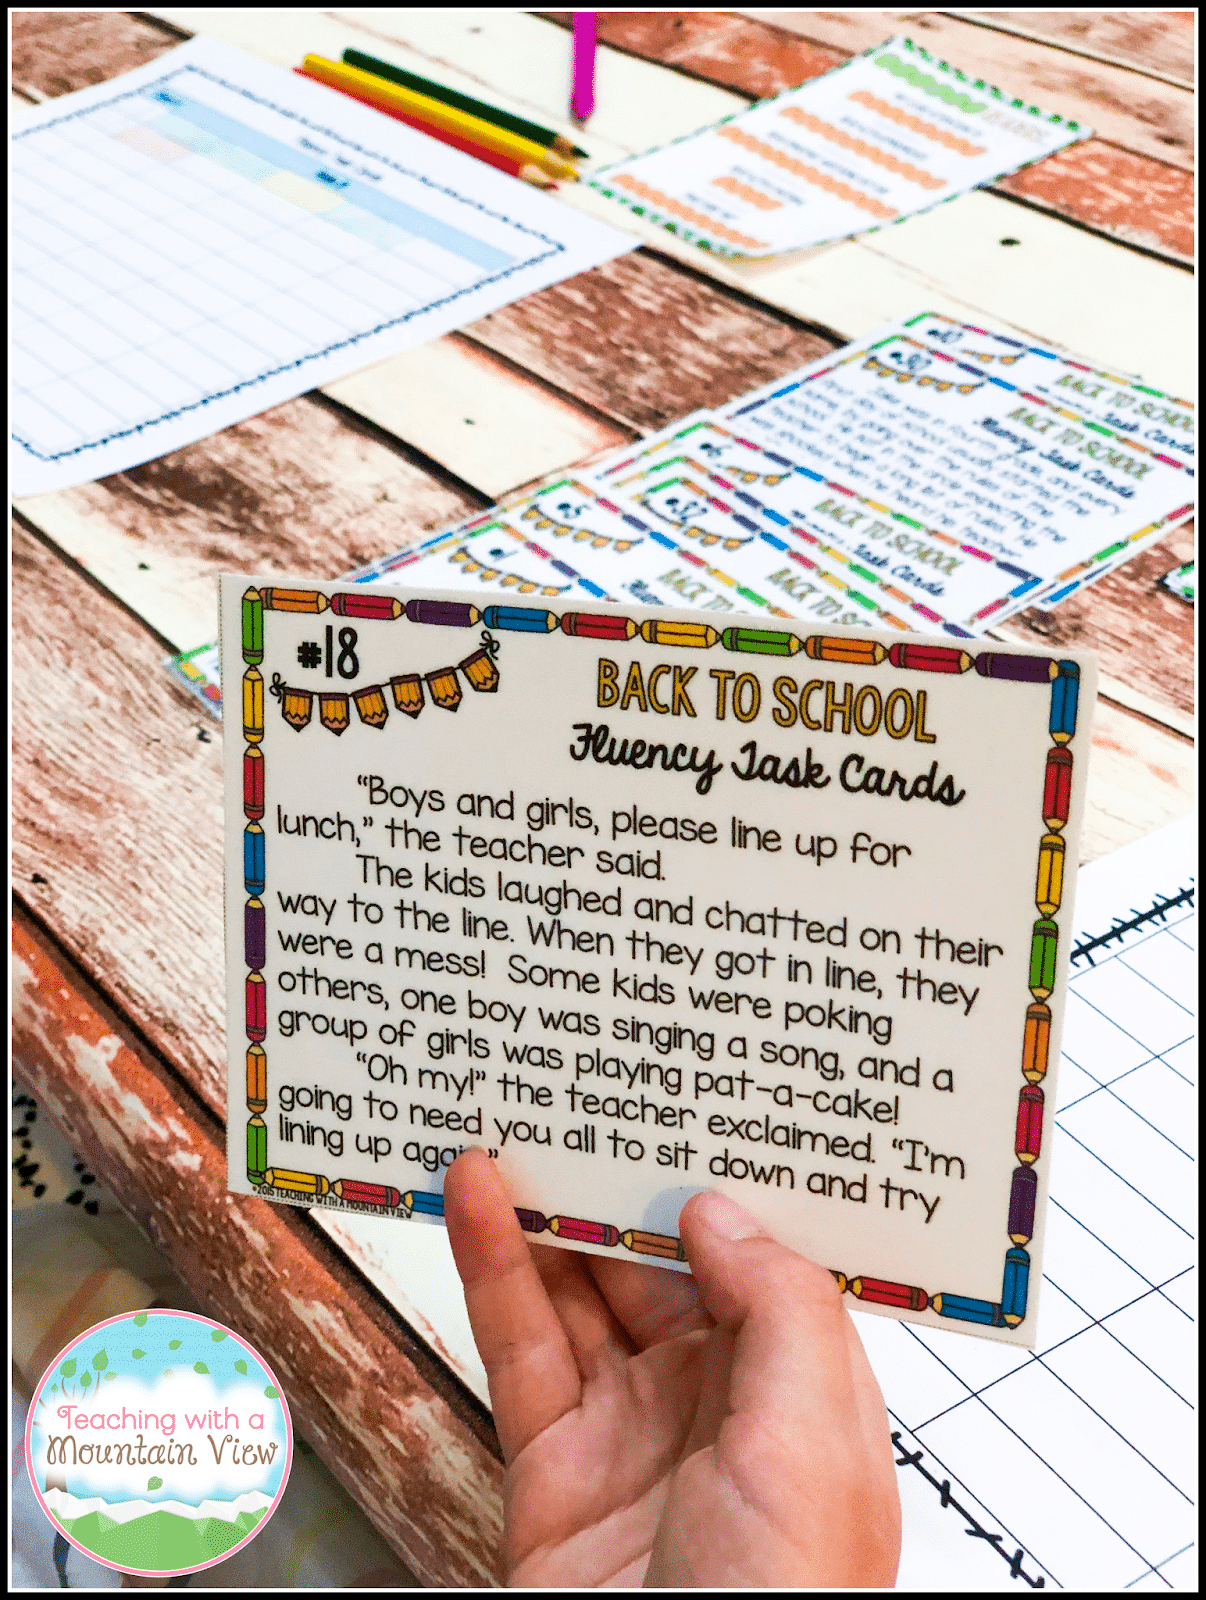
Comprehension Activity: I use one of my longer fluency task cards (usually from the Back to School set) and combine everything that we have learned over the last four days (accuracy, expression, punctuation, pacing) to read it. I’ve included one in your free set to use. Then I have them turn their card over and ask a few basic comprehension questions about it (Think: who, what, where, when, why questions).
After we have discussed all of these concepts, our anchor chart is done, and I post it up on the board, I also have small versions that they glue into their reading notebooks. This, along with a checklist for fluent reading that mirrors the anchor chart are available for free HERE.
Fluency Anchor Chart
Day 6 and beyond…
Now that your students know all of the components to fluency, it’s time to actively work on improving those fluency skills! I have a set of fluency task cards in my reading rotations nearly every single week. Back in 2012, I was in a reading interventionist role, and the only fluency resources my school used consisted of long passages where students read as much as they could in one minute, then read it again, and again, and again. This wasn’t motivating for my students, it required a teacher to be done well, they weren’t really reflecting on the progress they were (or weren’t) making, and engagement was almost zero. At that time, I was super into using and creating task cards, for their myriad benefits, and I thought, “WHY NOT FOR FLUENCY!?” That’s when I created the concept of fluency task cards and posted the first set of Fluency Task Cards ever available on TpT.
Here’s what I love about using fluency task cards:
- They are short passages specifically designed around critical fluency concepts.
- They aren’t designed to be timed. So instead of worrying about getting further into the passage with each read, students are instead focusing on actively improving all components of their fluency, not just their speed.
- They are designed to be visually appealing and the content is relevant and interesting so they are engaging to the kids.
- Students see immediate growth with research-based repeated reading.
- Students interact with one another and give each other feedback about ways they can improve.
- They are low prep and can be used year after year! Teacher win!
Most of the time, I have students read their fluency task cards with partners. I make sure they have the fluency checklist that I linked to above so that they can “rate” themselves at the end. We use a simple rating system of green, yellow, and red, and we talk a lot about what a red reading looks like (several accuracy errors, robotic pace, etc.) and what a green reading looks like (have they followed the checklist as best they can?). We aren’t looking for perfection to get a green, but improvement and overall excellent fluency.
During one rotation, they read each card at least 3 times, taking turns and discussing their strengths in fluency and areas they can keep working on. They are encouraged to use the language that we have already reviewed and therefore need to refer back to the rubrics and posters often. I try to give them a wide variety of opportunities to work with different partners. This also allows for them to get new feedback, too. They can usually get through about three cards during a 15 minute rotation.
Free Fluency Lessons
Resources
Are you ready to try out even more fluency task cards and put them into your reading rotations? I recommend starting with concept-based fluency task cards focusing on specific fluency skills.
- The Original Fluency Task Cards
- Prefix and Suffix Fluency Task Cards
- Dialogue Fluency Task Cards
- Punctuation and Expression Fluency Task Cards
- Nonfiction Fluency Task Cards
- Types of Sentences Fluency Task Cards
After your students have worked through those (or at the same time), you can start incorporating seasonal fluency task cards as well!
I do mix in other fluency activities into my rotations. They are only doing the fluency task cards about three days a week. However, I have seen major growth in my students since I implemented them. Here’s how I use them:
I also have a huge blog post about ways you can increase fluency. It features ten different ways you can practice it in the classroom (primarily during centers rotations). Be sure to stop by that post to get even more ideas, too! There are some tried and true gems there, too!
Mary Montero
I’m so glad you are here. I’m a current gifted and talented teacher in a small town in Colorado, and I’ve been in education since 2009. My passion (other than my family and cookies) is for making teachers’ lives easier and classrooms more engaging.

